Progressive Web App
Like many new developers, my goal was to learn how to make mobile apps. I thought it would be so cool to have an app I created on my phone and that I could share with others.
As it turned out, the skills I learned were how to make web applications, not mobile apps. But there is a way to make a web app look and feel like a native mobile app. So, until I learn how to build native apps, I’ll make Progressive Web Apps.
To make a Progressive Web App:
- Create an image to use as a favicon
- Go to favicon.io and choose the PNG > ICO converter
- Drag and drop the image into the converter and click the download button
- Move the downloaded images and the site.webmanifest file into the root of your project folder
- In favicon.io, scroll to the bottom of the page and copy the code to be added to the
<head>of the index.html file - You should now see your favicon in the browser tab. (Remember to remove any favicon you were previously using.)
The code in the site.webmanifest file is what allows your app to resemble a native app on a device as a Progressive Web App. There are a few changes to make to customize the site.webmanifast file for your app.
- Add your app’s name and short name
- Set the theme color which is the color that appears in the top bar of your app
- Set the background color which is displayed before your app loads.
Leave the current values for the icons and the display. The display property has a value of “standalone” which makes the app look like a standalone application without the browser’s UI — so your app looks like a native app. You can learn more about Web Manifest file in this MDN article.
You’re now ready to launch your app!
App development workflow
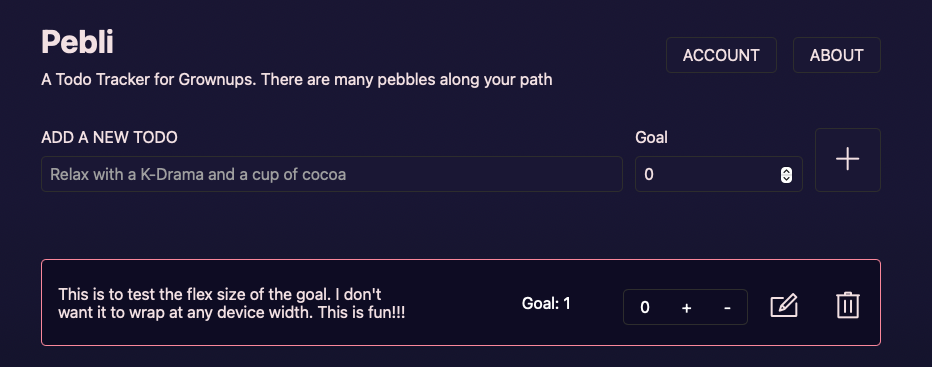
Before talking about deploying the app, I want to talk a bit about how the app was created. A while back I completed a TODO app tutorial on freeCodeCamp by Spruce Emmanuel. I liked the todo app overall and the tutorial was well written. (Find my writeup here.) The app used local storage and I wanted to try to convert it so that it used a Supabase database. (Find the writeup here.) When making this conversion, I found this video by Arpan Neupane super helpful.
I made good progress but then took a break because work became hectic. I was the curriculum writer for a class on Generative AI and that took all of the coding and brain resources I had available. When I came back to the app, I wasn’t sure where I needed to start and what I wanted from the app differed a bit than the approach by Arpan Neupane. I had stopped before the Edit and Delete functions, so the code was pretty similar to what was written for the Create and Read functions. When I was unsure, I turned to ChatGPT for syntax help.
Then I stopped again. Returning to the app, I found Windsurf and GitHub CoPilot had advanced to the point that, when queried, I received code that worked well in my app — which is really fantastic.
With the app at the MVP level, I worked through the steps above to turn my app into a PWA and I was ready to deploy.
Deployment
Ok, I thought deployment was going to be a piece of cake. Vercel offers a Supabase integration, which I hoped meant that after connecting the Supabase, Vercel, and my GitHub repo I would have a live app in minutes. But it didn’t work out that way. Vercel may have been making some platform updates at the time so your experience may be different.
I wasn’t able to connect my Supabase project with my Vercel project. I received an error message that I didn’t have permissions — which is strange since I’m the owner of both and there are no other owners it could be. But I reasoned that what the integration likely did was add the secret keys from Supabase to the Vercel project. So I opened my project’s .env file to find the keys I used to connect with Supabase when developing locally and updated my Settings in Vercel. And it worked! I was connected to my project’s Supabase db and I was able to receive a Magic Link.
(Que forbidding music here…) But the link didn’t work. The message in the browser was that I couldn’t open localhost on server 3000. I figured that there was somewhere in either my project folder or on Supabase that I needed to add a link to my Vercel deployment. Once I updated those fields on Supabase, I was able to log into my app. (This likely would have been covered by the Supabase integration had it worked.)
The todos that I had been added when working locally didn’t show up, but I wasn’t worried at first. Until I couldn’t add a todo. The change I hadn’t accounted for was that I had engaged RLS (Row Level Security) for the todos table and hadn’t set up Policies to allow CRUD actions. Fortunately, Supabase makes this super easy to set up and soon I was able to Create, Read, Update (Insert), and Delete todos. Happy days!
Final thoughts
This was a great project so I could learn more about using React, Supabase, and Vercel along with how to add new features to the app. I also became more comfortable using AI tools, which is increasingly important for a developer. I’m looking forward to playing with the code more and acting on the feedback I receive. Making a project like this that you develop over time using different tools is a great way to stretch yourself and grow as a developer. Sure, you’ll hit roadblocks. But, over time, you’ll build confidence that a little time and effort will allow you to overcome them.