I’ve had the idea for a while of creating a site that listed several Git actions that included a list of the commands that you would run. I wanted to break it down into catagories so it would be simple to find a solution when you weren’t sure how to update an existing project or resolve a merge conflict. You can view the project in it’s current state here. And you can fork or download the code here. It would be great if you left star. ⭐
I started by creating a site using only HTML & CSS. I wanted to bring in JavaScript to make the site interactive. But, I prefer starting with an MVP and gradually adding functionality and features until I’m happy with the site. You can see the code for the HTML & CSS only version here. (I plan on making some changes. 😄)
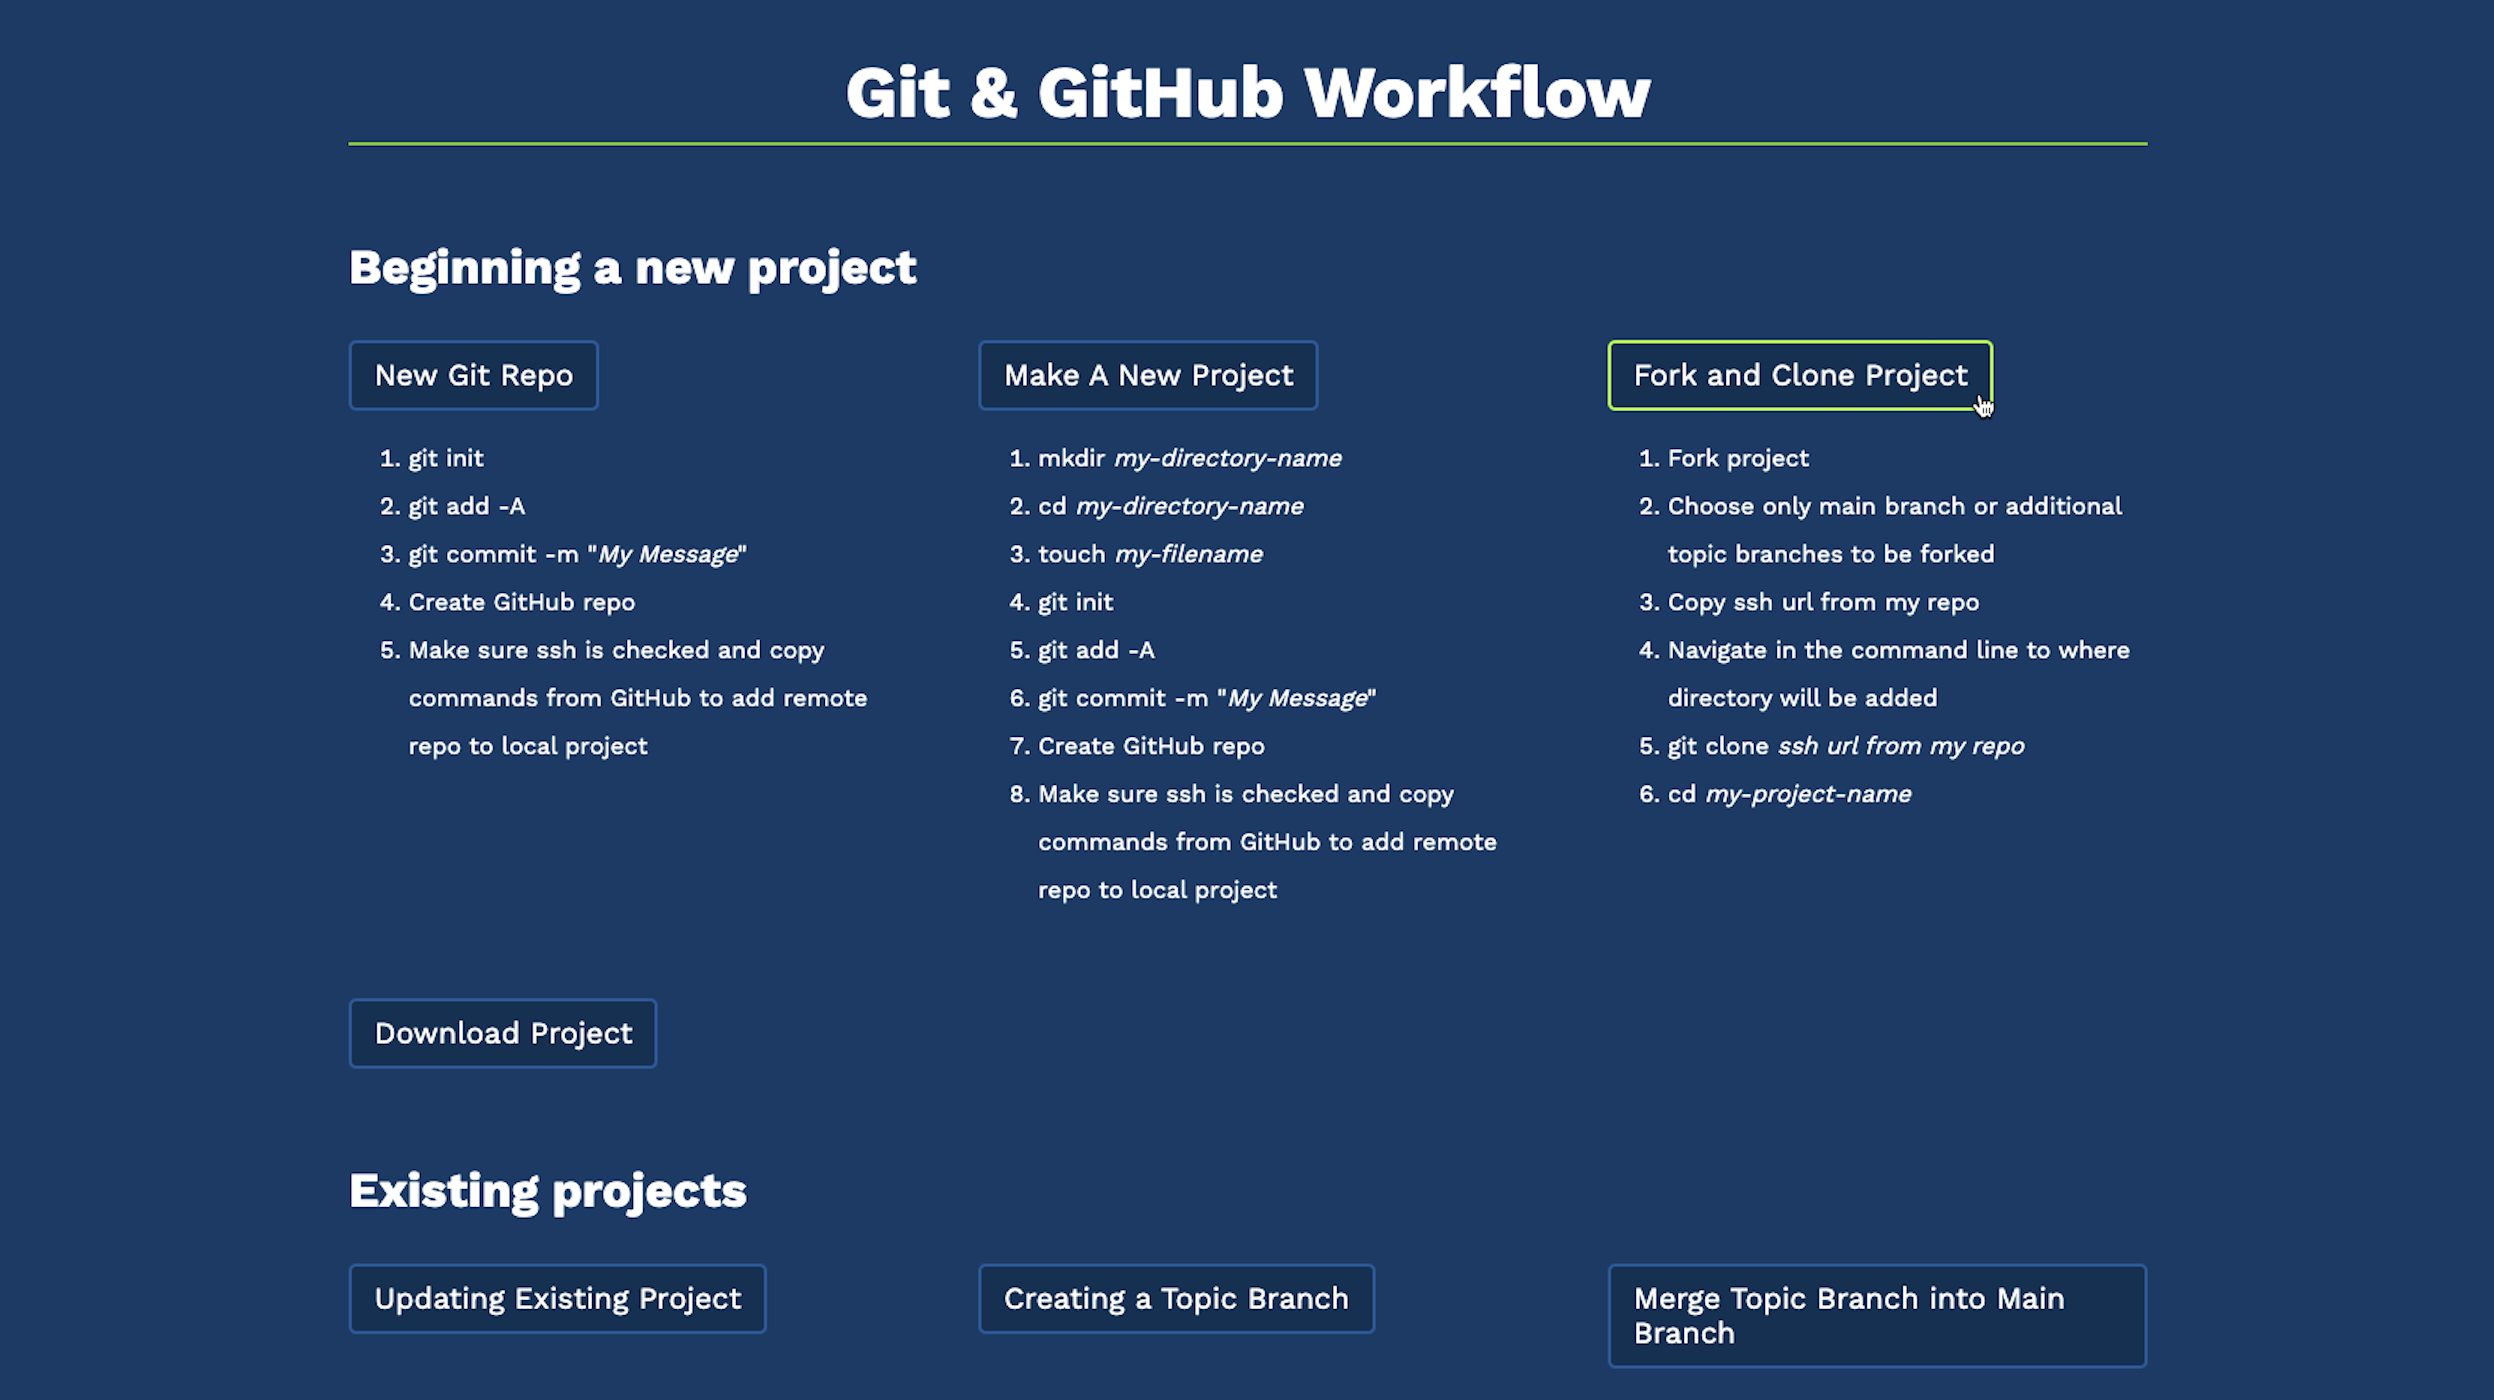
There are several sections for the site including “Beginning a new project” and “Troublehooting”. There’s also a great list of resources – always so helpful when you find yourself stuck and are about to just wipe your entire computer in frustration.
Once I had the site mapped out, I wrote out the pseudocode for the JavaScript. I knew I wanted to be able to click a button to reveal a list of the commands and I wanted to be able to see several lists at once. Also, I wanted to be able to close all the lists by clicking the escape key.
One of the JavaScript challenges was that I wanted to click a button, but the button was only the target. The action was to be applied to the list below it in my HTML. Using the nextElementSibling method was just the ticket to access the peek-a-boo list.
I ran into a small problem trying to hide and show the lists. Some buttons were only clickable on the very left side. Other buttons could be clicked anywhere within the button. 🤷♀️ It occured to me that the list, which wasn’t visible, was blocking part of the button from working. After adding the overflow: hidden; rule to the code block used to hide the lists, the entire button become clickable. 🙌 Another option was to set the font-size of the list items to 3px. This worked but I didn’t like the effect once I added a transition.
Next, it was time to add the ability to collapse all of the lists by clicking the escape key. I remembered that we have an exercise with a similar function in Skillcrush’s JavaScript Fundamentals class. After a copy and paste and a few modifications, the feature was up and running.
With the first MVP round of JavaScript finished, it was time to make some styling modifications. I didn’t like how the list popped out, so I added a small transition. I had been alternating between display: hidden; and display: block; to hide and show the lists. Since the transition property can’t manipulate the display property, I needed to search for a different solution. I had used the opacity property previously in a responsive nav and it worked perfectly in this project to create the effect I was looking for.
After adding a few other small tweeks to the styling, including a hover effect on the buttons and adding my logo to the copyright, the first round of JavaScript MVP was complete. I plan on adding more lists, especially for troubleshooting. If the page becomes too long, I may move “Troubleshooting” to it’s own page. I also want to add a modal for helpful hints – like hitting the escape key to close all the lists at once. And I’m considering using checkmarks instead of numbers for each list. I think it would be very helpful to check off commands as you run them. It’s not like you can’t look back at the previous command. But, personally, if I’m solving a problem I like having all the help and clues I can get! 🙂
Update 2/8/23
Added the media query prefers-color-scheme using Salma Alam-Naylor’s Dev.to post. Once I added the media query, I created the CSS variables that would take effect if the user had dark mode enabled in their system settings. Then I went through all of my color choices and chose options that looked good, and are accessible, in a dark color scheme. Beautiful!
@media (prefers-color-scheme: dark) {
  :root {
    --background-color: #0A3B67;
    --foreground-color: #FFFFFF;
  }
}
Update 2/10/23
Worked on both the HTML & CSS version and the JavaScript versions to allow a user to keep track of which Git commands they had run. For the HTML & CSS version, I changed the ordered list to checkboxes (GitHub repo.) I also made it so that clicking the text checked the checkbox. For the JavaScript version, I added the ability to cross out list items. Also, when the list item is crossed out the item turns grey. Both can be returned to their original color by clicking the list item again. And a user can hit escape to reset the JavaScript version.
I tried to make a utility function to close the list and to un-strike the list items, but I haven’t got it working yet. It’s one of those things that I know I know the answer to, but I can’t see it yet. I’ll get there! 🙂
I spent quite a bit of time adjusting the color of the buttons in dark mode. I also refactored my code to make it a bit more streamlined and readable. And as a final touch, I slightly changed the background color from #ffffff to #f9f9f9.
For now, this project is done. I decided against the modal. It seemed superfluous and overengineered. I might return to my code to refactor my JavaScript a bit. And I want to keep adding to the troubleshooting lists. But I’m happy with what I’ve made. 🙌