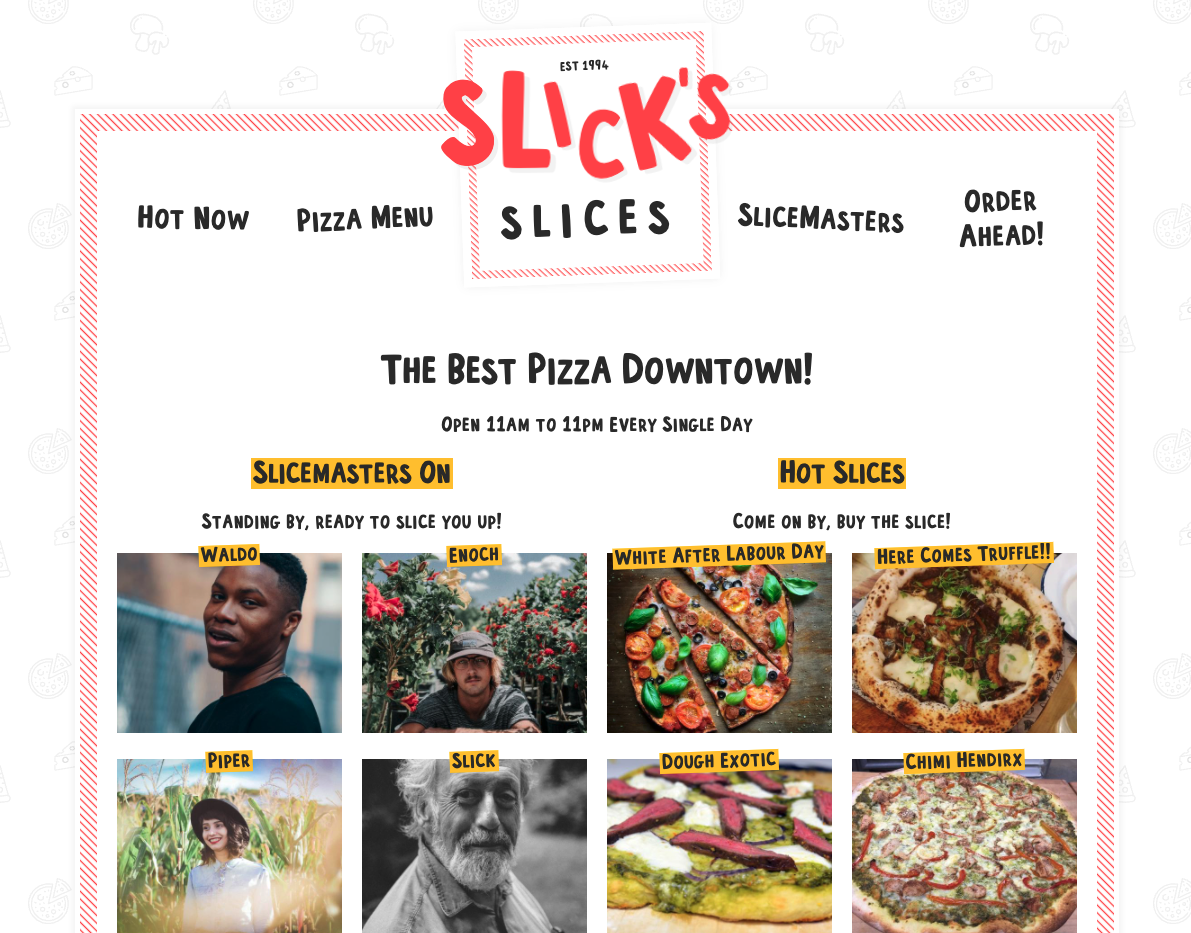
See Slick’s Slices!
I just started Wes Bos’ Master Gatsby course. I originally bought the course in late 2019 when it came out and intended to work through it during 2020 at some point. But then I got the dream job (Skillcrush!!!!) and didn’t really have time.
So now I’m doing more of a deep dive into React and think this would be a great time to pick it up. I’ve been interested in Gatsby for a long time, mainly because of someone I follow on Twitter, @hashim_warren. I’ve always found him to be an excellent source for finding subjects I would be interested in, from comics to coding.
tl:dr
- You’ll use GitHub to go live with Netlify. If you want to use version control while coding the project, make the entire project folder a repo with the Gatsby and Sanity folders inside.
- Make a note of the commands you use so you don’t have to try and figure out which video to refer back to. (Or is this just a me issue?)
- If you’re also using MAMP or XAMPP you’ll need to stop the servers since you’ll be using port 8888.
- Watching the video all the way through and then watching it again while I coded along worked best for me.
- I hit a few bumps along the way – not with the course but from things like figuring out I needed to stop the server on MAMP. The course is great so if you’re having an issue, you might do a search of this very long post to see if I had the same problem. Learning in public is great! 😂
First impressions Module 1/Module 2
A big takeaway is more personal. It’s been almost 4 years that I decided to take the leap into learning about web development, and starting this course, I could see how much I’ve learned and how comfortable I’ve become. Update Node package manager – no problem. Download files from GitHub – been there done that. Run npm start – can do! We’re going to make pages and use components – easy peasy. That I even know what these words mean tells me a lot about how far I’ve come. Suuuper Awesome! 🙂
So far, we’ve scaffolded our site files. We’re using both pages and components – which is pretty exciting for me since all of the React apps I’ve worked on so far have been single pages. As you would expect from any Wes Bos class, all of the videos are perfectly done with on-screen notes of any challenging bits, and there are lots of tips and tricks, including keyboard shortcuts and VS Code extension recommendations. And the GitHub repo includes stepped-solution files for each video in each module so that if something goes awry, you can compare your code to his. I always appreciate how he covers the details so well. (And if you’re still stuck, there’s a Slack you can ask questions in.)
The only problem I’ve had so far is that, for some reason, npm start didn’t work for me after creating the gatsby-browser.js file, quitting the server, and restarting. I kept getting a message that Layout was undefined. After checking my code against the stepped-solution code, I tried quitting and restarting a couple of times and the page rendered. Sometimes you just need to restart because something went awry somewhere. No need to panic, be frustrated with yourself or start doubting your ability to code. Just restart and see if it works out.
On to Day 3, where we start tackling CSS. I loooove CSS, so I’m pretty excited! 🤓
Module 3
CSS day!!! I love CSS, and this module did not disappoint. There’s a lot of styling going on for this site. The font-family is fun, the nav items are skewed, and there is a stripey border around the site. You may not want any of this for a future site you’re going to work on. But that really isn’t the point.
Along with learning how to add styles as components in React, Wes Bos adds little tidbits of CSS that are super useful and interesting. I’ve already written some CSS grid before, but it’s good to get in some practice. And even though this course isn’t on CSS or Grid, if you’ve never used grid before – it’s totally fine. He includes a short explanation and shows how the site changes each time he adds some style. It’s one of my favorite things about taking his courses.
Tomorrow we move on to how data is handled in a Headless CMS. 👩💻
Module 4
Today I changed “Day” to “Module” because I’m not getting through this entire module today. 🤓
Today was another day where I could tell that what I’ve learned before was serving me well. Today’s module begins working with Sanity, the CMS we’re using for this project. And we created several objects. There was a time that creating an object was confusing to me. Now I’m really comfortable surrounding pairs of properties and values in curly braces. I also know that “type” is a data type and “title” is the human-readable name of the field. Adding fields is very similar to adding fields using Advanced Custom Fields in WordPress – but you’re using code rather than ACF’s UI.
The CMS is fun. You create your own custom fields that will be used to add information to the database. There are lots of options available (time to read the docs!) We also imported a library of icons that can be used to add emojis called React Icons. There are several icon families to choose from.
Something that was really fun today was filtering using a boolean. We used it to filter out undefined values because undefined is falsy. It was a nice little trick. 😀 And we’re able to create one-to-many and many-to-one relationships between the data entered in our fields.
Tomorrow I’ll finish this module and maybe begin the next. 🙂
Module 4 con’t
I finished up Module 4. It was a pretty straightforward day – added another data type so we could add people who work at Slick’s Slices to the database, and we created a custom input field.
The custom input field option is pretty nice! Wes walks us through adding the ability to format the numbers the employee enters into dollars and cents. Overall it went pretty smoothly – the usual few tiny typos. (typos!!!!)
But a fun issue to figure out was that I didn’t seem to be able to change the price of the pizza. I checked my code against the video – nope. I checked my code against the solution code – not it. I copied and pasted sections of the solution code into my code – no go. 😡 I was able to enter an “e” but nothing else (do you see where this is going?) Probably by accident, I hit a number, and it worked! 🥳 When I looked at the pizza.js file in the schemas, I could see why. The “type” for price was ‘number’ .🤦♀️
Something fun I learned about is the Intl.NumberFormat method. It gives you the ability to format numbers so they look like currency. I chose USD – but there are other options. 💰😀
I’m already thinking of how I could use this project to create a personal project for myself. 👩💻
Module 5 Getting Data
Now we’re using GraphQL to create the bridge from our database to our app. We wrote queries to pull things like id, name, slug, toppings… And then passed that data to a component to render our UI. We’re really getting closer to being able to display the Pizzas on the site. 🎉
We’re also able to use GraphiQl to view our queries to see what they produce. This is an easier way to know what can be added to the query. 👍
It’s been a few days since my last post. I made one of those 🤦♀️ errors that just happen sometimes. I had cleared all of my tabs and closed out the terminal and text editor. (It’s annoying when they’re open and I’m trying to work. 😔 When I tried to bring it up again, nothing worked. I tried running a few commands I saw in the very helpful Slack Channels and thought I had somehow deleted all of my code!
I repeat these tutorials, usually a couple of times, and there’s solution code in a GitHub repo, so it wasn’t a huge deal. But I had no idea what I’d done and I felt a bit silly running commands in the terminal that I didn’t understand.
Then I thought, if a student presented me with this problem, what would I say? I was so caught up in what I had seen in the terminal and the commands I’d run that at first I had missed the obvious. I was trying to use the starter code on my desktop rather than the project directory I had written my code in. 🤷♀️ These things happen. But now I’m up and rolling again and fascinated by how the database in the backend connects to our React on the front end. 👩💻 On to the next module!
Module 6
This module is called “Puttin’ in work” and seems primarily about setting ourselves up for the next stage of the project. We added images and sample data, styled our pizzas page, and added queries to show the toppings. In a later lesson, we’ll code the ability to click through the toppings to see a page with the pizzas that come with that topping.
No real issues here, but I was thinking I was missing an ingredient or two. But when I looked at Wes’ example, I see he has “mushroom” listed twice. There are also pizzas in my list without an ingredient list. So we’ll see where that goes. 🤓
I’m enjoying the class. I understand what’s going on and the code I’m writing, even though this is the first time I’m using Gatsby, Sanity, or GraphicQL. I couldn’t write this from scratch yet, but I could see myself doing so after a bit of practice.
I’ve taken Wes Bos’ courses before, but I’m trying something new this time. I view the entire video first, then view it again and code along. I feel like I’m getting more out of it this time, which is great. 👍 He’s having a sale right now and I think I may pick up his other two React classes. The more I work with React, the more I like it. And I’ve always enjoyed working with databases and creating queries. I can really see creating a CMS for someone with this system. I think clients would find it relatively easy to fill in the fields – it’s a lot like ACF. And I enjoy writing the CSS. Maybe I’ll remake my portfolio with something like this?
Module 7
Time to build pages! This is a big reason I took this class. How do you build multi-page websites in React? I’ve only built single page sites before, so this is awesome.
To build multi-page sites in Gatsby, you use the Gatsby Node API and the createPages extension point, along with queries to the database to create pages and add content to the webpage dynamically. From there, pages are created with queries, looping over the data, and then styling the page. The createPage function is added in the gatsby-node.js file. And every time you update this file, you need to kill the process and run npm start again. Gatsby also gives you an alert so you can restart the server from the web page.
We’re also using an API, Sample APIs,to pull in the beer selections. The UI of this site has changed since the video was created but it looks very similar. You can choose “Beers” and then copy the endpoint to add to the fetchBeersAndTurnIntoNodes function in the gatsby-nodes.js file. Don’t be thrown by the different UI, sites change what we see all the time, but the functionality doesn’t change as often. Frequently the UX is simplified as is the case here. You only need to choose the API you’re working with, “ale” as the beer type option, and copy the endpoint. (You’ll notice the url is a bit different than the one seen in the video.)
One small issue in module 26 and 27. Although the ratings data comes over from the beers api used, it doesn’t display when queried. After checking to make sure the data was there by adding a console.log(beers); after the data was fetched and converted to json, I took a look in the Slack Channels. Fortunately there was a fix there. After adding if (!beer.rating.average) return; to the for loop inside of the fetchBeersAndTurnIntoNodes function in the gatsby-node.js file, I was able to see “rating” in GraphiQL and my code worked. 🎉
The next step was to style up the beers page using CSS Grid. There were a few details like making sure all of the beers have stars for reviews – gold for the review rating and greyed out stars to fill out the 5 stars. We also made sure that all of the tiles were the same size, even when a beer didn’t have an image by using object-fit: contain;. Unfortunately, many of the beers don’t have images. And the browser has added the empty image icon next to the alt text. I might look to remove that later. Other than that, the page looks great! 👍
Module 8
Ok, so I just had my Covid booster and my immune system is kicking my butt. But I wanted to fill you in that this module allows you to create pagination for the Slicemasters. Now we have 2 Slicemasters on each page and we’re able to navigate through the pages with both a previous/next link and the page numbers themselves.
To make this happen, we add an environmental variable GATSBY_PAGE_SIZE to set the page size. Then by mapping over the Slicemasters, we’re able to place two on each page. We also made it so that clicking on the “Slicemasters” in the menu doesn’t leave the trailing slash that throws off the pagination.
Something worth pointing out is that the Pagination component isn’t Slicemaster specific. Instead it focuses on the pages and the styling of the pagination. Now we’ll be able to use this component wherever we want. 👍
And for a bonus, we add another environmental variable, GATSBY_HOT_LOADER=fast-refresh (which may not be needed soon). Refreshing the screen is so much faster now!
Something I really like about these videos is that you always learn some debugging tricks. If he makes a mistake, he debugs right in the lesson. Since no one writes perfect code, having this extra instruction is super helpful!
Hope I feel better tomorrow! 😀
Module 9
I feel better!!! 🙂
Module 9 is a mix. We create a single Slicemaster page for each Slicemaster and we implement some SEO by adding information for the <head> to our site.
The single Slicemaster page went pretty smoothly except I had a few typos. It took me a minute to work through each one. But that’s what we do! I had a bonus that we used the “Saved As” feature to create a duplicate of a page. And I think being reminded that you can do that will help me help students debug. 💃🏻
Adding the SEO information to the <head> was great! We created a reusable SEO component with the help of a plugin called Helmet. Then, once we created the component, complete with all the meta tags including Open Graph, we added the component to all of the pages and templates. Using a component this way saves a ton of time since I didn’t have to add that 17 lines of code to every page. WooHoo!
One note- the SEO component was added before the content. It makes sense but it’s something pretty easy to not consider beforehand. 🙂
Module 10
Time to code how to order a pizza!
I’m starting to see how many different modules we’re building. The order.js file alone has 12 imports currently. We have modules to calculate the price of a pizza, to format the money, to style the order, for SEO… All modules that could be reused in a different application.
It’s usually at this point I try to take a minute to think of what else this could be used for. Really any site where someone places an order that is sent through email. If you sold courses or books for instance, something like this would be perfect. It doesn’t have all of the complications of a store. (There is a course for that I’ll be taking in 2022.) But it would do the trick for many applications.
This could have really worked for the It’s a Racquet site to sign up for the tournament. I wonder if we’re going to create the ability to add additional ingredients to the pizzas? If so, I could really see this as a sign up site for a lot of tennis related activities.
This is my first time using hooks. We created a custom hook for the order form. The hook allows us to update state. I’m not clear yet why hooks are better than setting state. I’ll likely need to do some research to find that out.
There was an issue with refresh. Instead of the page, I just had a white screen. It “fixed” itself when I closed out the console and restarted it. But it happened again and closing the console and restarting npm didn’t fix it this time. So I tried closing out page and going to the home page. I received a message about the page not loading and then the page loaded. 🤷♀️ For now, I don’t know if that’s because of the live server update we did a few lessons ago or something unrelated. But, if you’re having the same issue, it might be worth a try.
Module 11
Work has been crazy so I left off a little and closed out my terminal – which I think caused a problem for me. Sanity isn’t recognizing me as an admin so it isn’t letting me deploy. We’ll see what I need to do about that! 🤓
This was a really big module and we did a lot. I’m sure I had some hiccups along the way, but I don’t remember what they are, except for the one I’m having right now. 🤷♀️
In this module, we used Custom Hooks to send order data via email and to enable client-side data fetching (remember, this is Gatsby so it’s a static site once it’s deployed. We also coded serverless functions, created a store settings page, and created a Honey Pot to ward off bots.
The Honey Pot was pretty cool. Basically, a hidden input field that a bot would fill out, and then the order is filtered out. An elegant solution.
Hopefully, I can move forward even with the issue I’m having. I commented out some code to keep from having an issue, so I’ll need to remember to uncomment it next time. I’m thinking that’s a 50/50.
Something I’m realizing I missed out on. As I work through a tutorial like this, I need to keep a list of commands run in the terminal and how I signed up for things. I wonder if the root of my issue with Sanity is that I signed in with two different methods. We’ll see.
Woo Hoo! Figured out the issue to why I wasn’t an authorized user and that I was seeing a 401 page. I was signing in with GitHub – but I’m signed into Skillcrush’s GitHub on my default browser. And obvs, Skillcrush isn’t an authorized user for this project. Once I signed out of GitHub and signed in as myself, I was able to deploy to production. 💃🏻
Module 12
We built out the grid for the homepage and added a “Loading” animation and a fuzzy image that appears as the images load. I think my internet may be too fast to show the image loading slowly. So I’m going to use Lighthouse later to slow down my internet speed to see if I have the effect going.
In the “I’ve learned something” category. Today when I started the servers I noticed that the Hot Slices section of the homepage was blank. So I quit the process, deployed to production npm sanity run deploy, and restarted the servers again. 🤓
Something I’ve really enjoyed about this course is all the things you learn along the way beyond Gatsby and Sanity. Like lqip which is “Low Quality Image Placeholder” – a version of the image that subs in while you’re waiting for the image to fully load. I’m also getting to use Grid, which I haven’t used in a lot of projects before but I’ve always really liked. And there are some transitions in place.
The next time I blog a course while I take it, I’m going to add a tl:dr “What I learned” and “Commands used” to the top of the blog post. Maybe link them to where I add the blog entry. That would be super helpful to future me. 🙂
Module 13
It’s finished! And it’s beautiful!!!
The final module is to build and deploy the site. We also clean up the responsive styles. Deploying is always fun, if nerve-wracking. You see error messages and you have No Idea! why. 🙂 Fortunately, the response from A-J Roos in the Slack channels was steller. Even though it was a weekend, he took a look and saw that I had a bit too much code in the placeOrder.js file. So if you see a “Request must be smaller than 69905067 bytes for the CreateFunction operation” warning, you might take a look there too. 👍 I checked with A-J Roos and the line “Failed to upload file: placeOrder” would have been my clue where to look.
After my site was uploaded there were a few errors to resolve. I had a typo to fix in the usePizzza.js file. And it looks like you need to be signed in to Ethereal Email (if that’s what you’re using to avoid a (I think) Post error. All good now!
We also added a hook so that a change to the Sanity database triggered a build. This automatic deployment is really fantastic. I can imagine a client making changes to the store and the build following seamlessly. (When you push to GitHub, there’s an automatic deploy also.)
One other note about deployment. I had placed this project under version control – but with separate repos from Gatsby and Sanity. But when it’s time to deploy, Wes has you place the entire Master Gatsby directory under version control. Fortunately, I walk people through how to remove a directory from version control all of the time. 🙂 So once that was done, I was able to push to GitHub and start the process.
Final Thoughts
This is really a great project and I learned a lot! I can also see this site being very useful for the right client. And I enjoyed knowing more about automatic deployments. I obviously hit a few bumps along the way. I tried to remember to note all of them here so that, if you’re having the same problem maybe you’ve found the answer. I might even add a tl:dr of them. But that’s waiting for future me and I always give her too much to do.
Happy Coding! ❣️